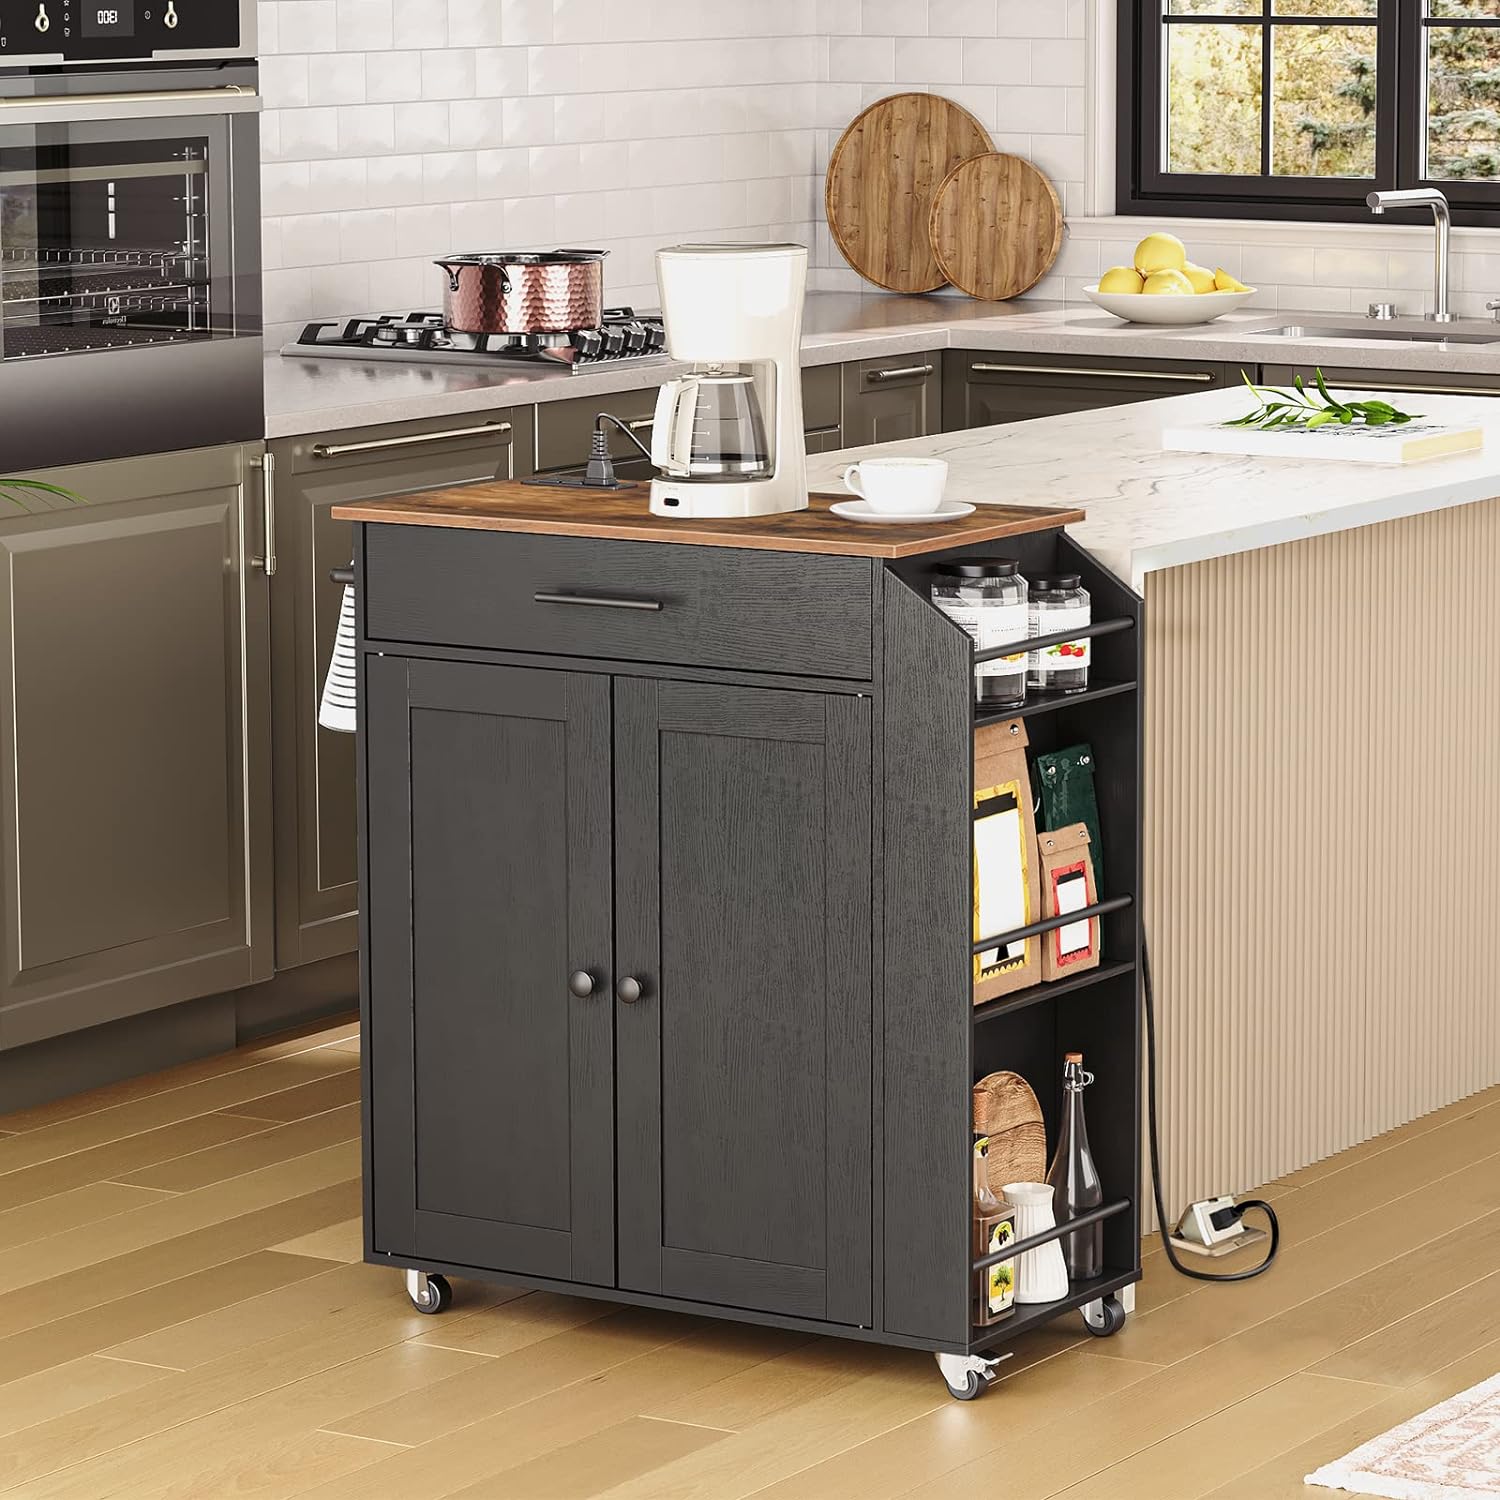
A rolling kitchen island cart is a freestanding work surface on wheels — think of it as a portable countertop with storage underneath that you can park anywhere in the room and roll out of the way when you don’t need it. The “with power outlet” version adds one more thing: a built-in electrical strip, usually one to three outlets and a USB port or two, so you can plug in a slow cooker, a hand mixer, or a warming tray right at the island without running an extension cord across the floor. That sounds like a straightforward upgrade, but it changes the buying decision in ways that aren’t obvious from a product listing. This article walks through what that outlet feature actually does in daily use, what assembly will realistically cost you in time and frustration, where the quality risks are, and whether the powered version earns its premium over a comparable non-powered cart. If you have a cart in your browser tab right now and you’re deciding whether to add it to your cart or keep looking, you’re in the right place.
| EDITOR'S PICKHomestyles Mobile Kitchen Islan… | Mid-tierIRONCK Kitchen Island with Stor… | Budget pickHOOBRO Kitchen Island with Powe… | |
|---|---|---|---|
| Power outlet | — | — | ✓ |
| Drop leaf | ✓ | ✓ | — |
| Drawer | — | ✓ | ✓ |
| Spice rack | — | ✓ | ✓ |
| Dimensions | 18D x 53.5W x 36H | — | — |
| Price | $225.58 | $118.99 | $108.99 |
| See on Amazon → | See on Amazon → | See on Amazon → |
What the Built-In Outlet Actually Does — and Doesn’t Do
Let’s start with the honest version of the value proposition. Across aggregated owner reviews of HOOBRO kitchen island carts — which represent the most reviewed powered-island SKU in this category as of mid-2026 — a consistent pattern emerges: buyers didn’t buy the cart for the outlet, but the outlet changed how they use it. The most common unlocked use case is buffet or hosting service: a crockpot, an electric chafing dish, or a warming tray sitting on the island’s drop-leaf extension (a fold-down panel that expands the work surface) during a gathering. At least one HOOBRO reviewer explicitly purchased the unit as a dedicated microwave cart, citing the outlet as the deciding factor.
That’s a narrower payoff than the marketing implies. The outlet doesn’t turn the island into a full appliance station — the circuit is routed through an extension cord that plugs into your wall, so you’re still bound by whatever circuit your kitchen or dining room is on. What it does is eliminate the visible cord running from a plug-in appliance across the floor to the nearest outlet, which is a real quality-of-life improvement during hosting and a legitimate safety upgrade (tripping hazard reduction). Reviewers at Apartment Therapy have noted that cord management is one of the most underrated factors in kitchen island usability, and the built-in strip addresses exactly that friction.
The tradeoff: powered islands typically run $30–$70 higher than equivalent non-powered models from the same brand, and that premium buys you a cord-routing channel and a strip that’s spec’d at standard household amperage (15A in most units) — not a hardwired circuit, not a dedicated appliance line. If your primary use case is parking a 1,500-watt toaster oven on the island full-time, the outlet isn’t the feature you need; a dedicated countertop location with a dedicated circuit is. But for intermittent use of slow cookers (typically 200–300 watts on low), warming trays, or charging devices, the math is fine and the convenience is real.
Assembly Reality: Time, Tools, and Where It Goes Wrong
This is where the review record is richest and most useful, because assembly experience varies dramatically by brand and SKU — not just by buyer skill level.
HOOBRO: Reviewers consistently flag one piece of advice above all others — stop before you start and buy an electric screwdriver (a power drill with a screwdriver bit). The unit ships with a manual hex key, and the screw count is high enough that finishing by hand leaves most people with sore palms and a project that took twice as long as it needed to. With a cordless drill, owners report two to three hours for a solo build. Without one, budget four to five hours and expect fatigue-related alignment errors in the back half of the build. Door alignment — getting the cabinet doors to hang level and close flush — is the most cited quality complaint across HOOBRO kitchen island reviews. The hinges are adjustable, but the adjustment range is narrow, and if the carcass (the box frame of the cabinet) isn’t perfectly square when you close it up, the doors won’t cooperate. The fix is to assemble the carcass loosely, check for square with a tape measure corner-to-corner before tightening, and only then drive the final screws. This step is not in most instruction sheets.
VEVOR: Owners in long-run reviews describe a materially more complex build — one reviewer documented a two-day assembly over a weekend, explicitly noting it was “worth it” but that the instructions required interpretation. VEVOR islands tend toward heavier gauge steel frames and larger overall footprints, which means more parts and more alignment-critical steps. The two-day timeline isn’t an outlier; it shows up independently across multiple reviewers. The payoff is a sturdier finished product with less flex in the frame, which matters if you’re using the drop-leaf as a working surface under real load.
Homestyles: At the opposite end of the assembly-complexity spectrum. Multiple owners describe the Homestyles unit as among the easiest furniture builds they’ve encountered — pre-drilled holes that actually align, hardware labeled clearly, and a design that comes partially pre-assembled from the factory. If you’re short on time, have a small space, or are building alone without power tools, the Homestyles build experience is a genuine differentiator.
By the numbers:
| Brand | Reported Solo Build Time | Power Tool Needed? | Door Alignment Risk |
|---|---|---|---|
| HOOBRO | 2–3 hrs (w/ drill), 4–5 hrs (manual) | Strongly recommended | Moderate — adjustable hinges |
| VEVOR | 6–12 hrs across sessions | Required | Lower — heavier frame self-squares better |
| Homestyles | 1–2 hrs | Optional | Low — partial pre-assembly |
Surface and Finish Quality: The “Fake Wood” Tradeoff
One thing the product photos don’t communicate well is how the top surface reads in person. For ONBRILL-topped islands — a composite wood-look finish used on several mid-range SKUs — at least one owner’s review describes the top as looking “really fake” up close while still rating the overall piece as aesthetically acceptable for their space. That’s a useful data point: the finish works at the room level but doesn’t hold up to close inspection the way a real butcher-block or hardwood top does.
This is a meaningful distinction if the island is going in a visible entertaining space versus a laundry room or utility position. Wirecutter’s kitchen island guide notes that the gap between entry-level laminate tops and solid-wood tops is most noticeable in raking light (light coming from the side, which happens in most kitchens near windows), where real wood grain reads as warm and composite surfaces read as flat and plasticky. If your island is going against a wall away from windows, composite is fine. If it’s the visual center of an open kitchen, the wood-look laminate on a $250 island is a real aesthetic compromise.
Room Placement: These Carts Travel Further Than You’d Expect
One of the more interesting patterns in the owner review record is where these islands actually end up. Kitchen island carts are being placed in laundry rooms (as a folding-and-sorting station with the outlet used for a small steamer), dining rooms (as a permanent sideboard with the drop-leaf as a serving extension), craft rooms, and home offices. This Old House’s coverage of freestanding kitchen storage consistently points out that the “kitchen” label is a marketing convention — these are just carts with a work surface and storage, and casters (rolling wheels) make them genuinely room-agnostic.
The outlet feature is, if anything, more useful in a non-kitchen placement. In a laundry room or craft space, you rarely have a convenient outlet at work-surface height; the island brings the outlet to you. In a dining room, it enables chafing dishes and warming appliances during serving without the cord problem described earlier.
The practical consideration for non-kitchen placement is floor type. Most kitchen island casters are rated for smooth hard floors (tile, hardwood, LVP) and are genuinely easy to roll on those surfaces. On carpet, rolling resistance increases significantly and the caster locks — small lever mechanisms that keep the cart stationary — become more important for stability during use.
Frequently Asked Questions
1. Is the power outlet on rolling kitchen islands actually safe to use with appliances like crockpots?
Yes, with normal household precautions. The outlet strip on units like the HOOBRO is rated at standard 15A/120V — identical to any wall outlet in your kitchen. A crockpot on low draws roughly 200–300 watts, well within that rating. Don’t exceed the strip’s total rated wattage across all plugged-in devices simultaneously, don’t use it with high-draw appliances like standalone electric ranges or large toaster ovens, and ensure the cord routing to the wall outlet isn’t kinked or pinched under a caster. Treat it like any extension cord situation: occasional, moderate loads are fine; permanent high-draw loads belong on a dedicated circuit.
2. How long does assembly realistically take, and do I need a helper?
Solo builds are reported as achievable for all three major brands, but HOOBRO and VEVOR benefit significantly from a second person during the step where the carcass has to be held square while you drive fasteners. If you’re building alone, a set of right-angle clamps (about $15 at any hardware store) substitutes effectively for a second pair of hands. Budget two hours minimum for any of these units; VEVOR owners should plan for a weekend project, not an afternoon.
3. Do the cabinet doors align properly out of the box, or is adjustment required?
Adjustment is frequently required, particularly on HOOBRO units. The hinges are European-style (adjustable via a Phillips-head screw), which is actually good news — it means you can fix misalignment without tools beyond a screwdriver. The key is squaring the carcass before you close it up. A twist in the frame of even 3–4mm will cause visible door gap. Take five minutes to measure diagonals before tightening the final assembly screws and you’ll avoid 90% of this issue.
4. Can these kitchen islands go in a laundry room or dining room instead of a kitchen?
Absolutely, and owners regularly do exactly this. The casters make room transitions easy, the storage works for non-kitchen supplies, and the outlet is useful anywhere you need a plug at work-surface height. The main consideration is floor type — smooth hard floors roll easily, carpet adds friction and requires more attention to caster lock engagement during use.
5. Is the drop-leaf extension sturdy enough to use as an actual work surface?
For light tasks — plating food, folding laundry, sorting mail — yes. For chopping, kneading dough, or tasks that involve significant lateral force, the answer depends on how well you’ve squared and tightened the frame during assembly. A well-built VEVOR island’s drop-leaf is materially more rigid than a HOOBRO’s due to frame gauge differences. Don’t plan to use a drop-leaf on any of these carts as a cutting board replacement; it’s a serving and staging surface, not a prep surface under load.
6. What tools do I need before I start assembly that the instructions don’t mention?
The universal gap in kit instructions: a cordless drill with a #2 Phillips bit (saves significant time and hand fatigue), a rubber mallet (for seating dowels without cracking MDF panel edges), a tape measure for checking carcass square, and blue painter’s tape to temporarily label parts by the instruction diagram’s part codes. For VEVOR, add a second person or right-angle clamps for the frame-squaring step.
The Decision Rule
If you’re deciding between a powered and non-powered island at similar price points, the outlet upgrade pays off if any of these describe you: you host gatherings where slow cookers or warming appliances sit on the island; you’re placing the cart in a laundry room, craft room, or any space where outlets aren’t at counter height; or you want clean cord management as a permanent feature. The $30–$70 premium is justified on the convenience-per-use math for those scenarios.
If your primary use is prep surface and storage and you’re not parking appliances on the island, skip the outlet version — the non-powered model at the same price point buys you a better top material or heavier frame for the same money.
On assembly: if you have two hours, a drill, and moderate furniture-building experience, HOOBRO is a reasonable choice. If you want the easiest possible build, Homestyles is the clear answer. If you want the most durable finished product and can commit a weekend, VEVOR’s frame quality reflects the extra time investment.